How Fluid Works
This page gives you the mental model behind a Fluid integration: how a transaction travels from your page to the payment orchestrator and back, what the cashier flows look like, and where the pieces you do not control from code are managed.
A Fluid integration has two halves, and this manual covers one of them. The front end half, adding and driving the cashier on your pages, is what these pages document. The backend half, your platform's integration with the payment orchestrator for user and session verification and for receiving transaction result notifications, happens directly between your backend and the orchestrator and is arranged during onboarding; it is not configured through Fluid and not covered here.
The end to end flow
- The user authenticates on your site. Fluid has no login of its own; your platform's session is the source of truth. See Session handling.
- You load the Fluid script and mount a widget with the user's identity attributes. The widget initialises itself against Fluid and reports
initialisedwhen it is ready to open. - The user transacts in the cashier. The widget presents payment methods, amounts and bonuses based on the attributes you passed and on your operator configuration, and drives the transaction through the payment orchestrator.
- The result travels back. The payment orchestrator always delivers the transaction result directly to your backend, through the server to server notification you have set up with the orchestrator; that is the authoritative channel, and Fluid is not part of it. In parallel, the widget shows the outcome to the user and emits it to your page as events.
- The session ends when the user logs out and you remove the widget from the DOM.
Where content and configuration live
Not everything the cashier shows comes from your page attributes. A significant part is managed in Fluid's CMS backed back office, configured per operator. You do not need to master it to integrate, but you should know which concerns are handled there, because "how do I change this text / colour / error" questions are answered in the Back Office Guide, not in code:
- Translations and text content: every string in the cashier, per language, through Content sets. This includes the buttons of the final success and failure screens.
- Theming: colours, icons and visual identity, so the cashier matches your brand, through Theme; time boxed themed experiences through Campaign.
- Error mapping: orchestrator error codes are translated into user facing messages through the Error collection, so users see actionable text instead of raw codes.
- Payment methods: which methods are available and how they behave, through Payment method and Operator Payment Methods.
- Input fields: the fields presented to users per payment method, through Input fields.
- Success screen promotions: promotions shown after successful transactions, through Success Screen.
Access to the back office is provided by Fluid Payments during onboarding.
The cashier flows
Deposit. The user picks a stored or new payment method, an amount and optionally a bonus, and confirms. Payment method ordering, per method deposit limits and suggested amounts come from your operator configuration and the data you pass. The example below shows the journey for a 100€ credit card deposit.
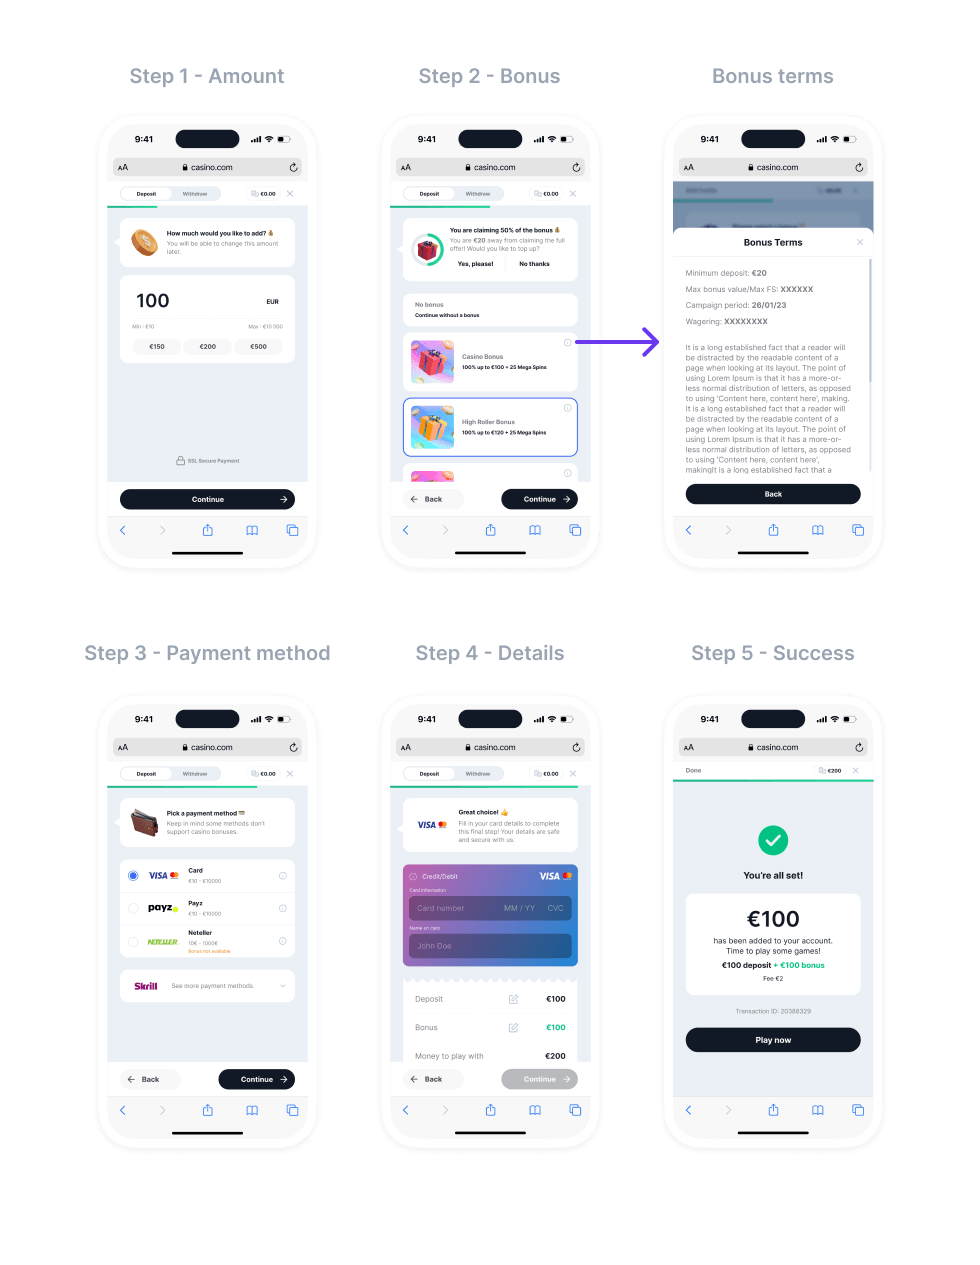
Figure 1 - Example User Journey for a Deposit
Quick Deposit. A shortened deposit for returning users: with a recently stored method, entering e.g. the CVC and an amount is enough. It is available as a flow of the main widget (transaction="quick-deposit") and as the inline Quick Deposit element.
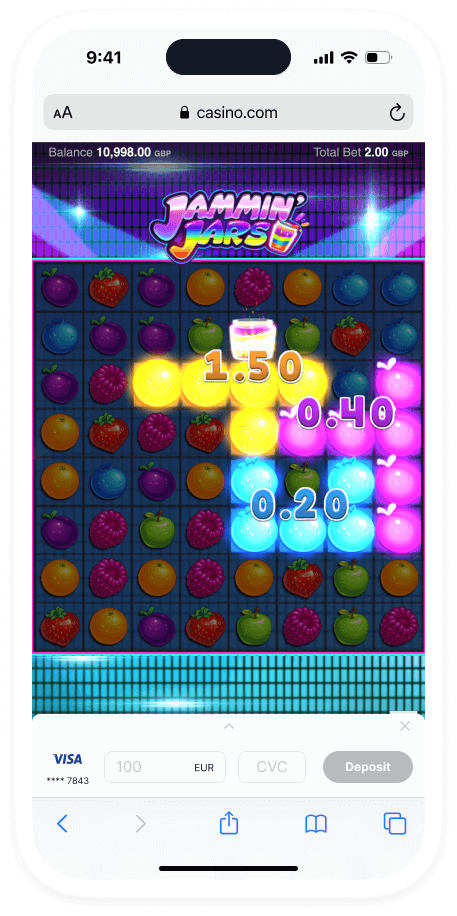
Figure 2 - Quick Deposit: Step 1
Withdrawal. The user withdraws up to the withdrawable-balance you pass on the widget.
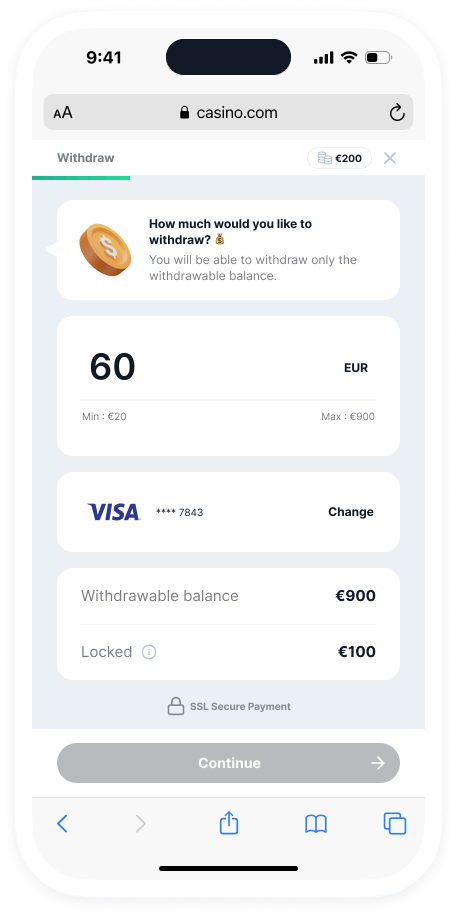
Figure 3 - Withdrawal: Step 1
Sweepstakes. For sweepstakes operators the flows are purchase and redeem instead, served by the dedicated Fluid Virtual widget.
Responsible gaming. When you pass transaction-limits, the deposit and withdrawal amounts are capped to the values you send, across payment methods, and the user is informed when they exceed one.